
Milling bits
Amber D'Halluin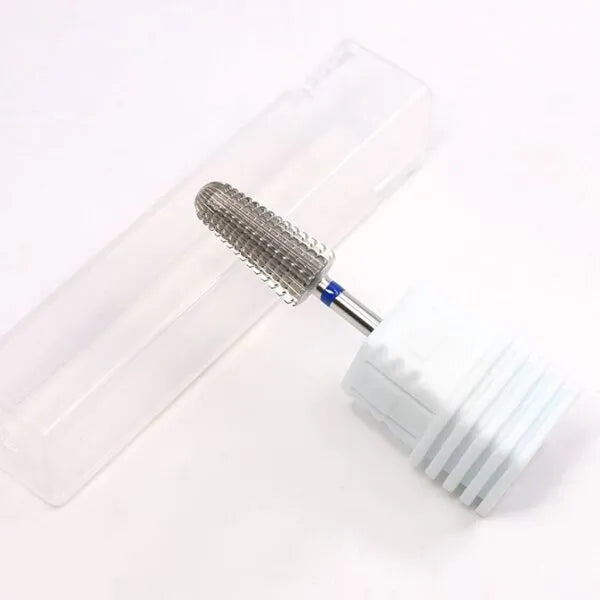
1. What are router bits?
For many nail stylists, milling bits replace ordinary files. Milling bits are the most important element of a milling machine, without bits you cannot use the nail drill. It is attached to the handle of a milling machine. The milling machine ensures that the bit makes rotating movements, allowing you to easily and effortlessly perform many steps of a manicure. Think of lifting, removing, removing excess skin and removing, shaping, smoothing and filing artificial nails.
Milling bits ensure perfect preparation of the nails for further treatments. For each step a different milling bit is used. They differ mainly in their shape from which they are made and the gradation.

2. What material are milling bits made of?
There are different types of nail drill bits that are suitable for different purposes. Just like files, milling bits have a gradation. The gradation of milling bits can be recognized by a colored stripe. The color with the smallest grit is black, then you have yellow, red, blue and green. In the Mistero Milano range you will only find the middle gradations (red and blue). In addition, you also have sanding caps and sanding rollers that have almost the same function and gradation as a normal file. Below you will find more explanation about the different bits and their function.
2.1 Cuticle Bits
Cuticle bits are also called diamond bits. This is because they contain a very fine diamond grit. They are used to lift cuticles, remove and remove excess skin around the nail plate.
2.2 Bits for artificial nails
In the Mistero Milano assortment you will find these bits in 2 different colors, blue and red. Blue is used for removing, smoothing, shortening and shaping gel, acrylic and polygel nails. Red is used for removing gel polish nails. These bits are available in 2 different shapes. One has a head that is more rounded than the other, which is better for beginners. This is because with a sharper point you have a greater chance of causing wounds.
2.3 Ceramic bits
Ceramic milling bits are used to remove artificial nails. The bits are made of zirconium oxide, which makes them very durable and resistant to damage. They do not generate heat when filing away artificial nails. Just like the bits for removing artificial nails, the ceramic nail milling bits in the Mistero Milano range can be found in 2 different colours. Blue for removing, levelling, shortening and shaping gel, acrylic and acrylic gel and red for removing gel polish.
2.4 Sanding rollers
The sanding rollers usually have the same gradations as regular files/buffer files. The rollers must be placed on a sanding cap holder. These rollers can be used for different purposes, depending on the grit. Gradation 100 is used for removing and shortening artificial nails, gradation 150 is used for touching up gel, acrylic and polygel mass and gradation 240 is used to touch up the natural nail plate.
2.5 Sanding caps
The sanding caps are mostly used for pedicure treatments but can also be used to remove artificial nails. The sanding caps must be placed on a sanding cap holder. The caps can be used for different purposes depending on the grit. Grade 60 & 80 are used to remove calluses from the feet and to remove artificial nails. Grade 120 is used to smooth the skin of the feet.
3. How do I choose the right bit?
Each bit has its own advantages and specific function. The choice of a bit depends on the type of treatment you want to perform on your nails. With the help of various milling bits you can perform various treatments, such as:
- Lift and remove cuticles
- Preparing your natural nail plate
- Remove excess skin around the nail plate and on the nail plate
- Shorten nails
- Removing artificial nails
- Remove calluses
For each specific treatment it is important to choose the right nail bit. In the overview above you can find which nail bit is suitable for which treatment.
4. Maintaining your router bits
For the safety of your customers, it is very important to clean and disinfect your bits after each use. Usually, disinfecting your nail tools is enough, but it is even better to sterilize them at the end of the day to kill all bacteria. In the overview below, we explain how to clean your nail bits correctly.
Step 1
Remove any dust and residual artificial nail product present on the bit with a nail brush or bit cleaner.
Step 2
If not everything comes loose, soak the bit in acetone for about 5 minutes and then rub everything again with the nail brush or with a bit cleaner.
Step 3
Clean the bit thoroughly with warm soapy water, rinse well, and then dry the router bit thoroughly.
Step 4
Soak your mouthguard in disinfectant for about 5 minutes to disinfect it.
Step 5
Then dry it thoroughly and put the bit back in a covered box where it cannot get dusty.


